Integration of Behnke door intercom system with Wildix IP PBX
This document explains how to set up the integration of the Behnke door intercom with Wildix IP PBX.
Created: April 2020
Permalink: https://wildix.atlassian.net/wiki/x/rALOAQ
Wildix basic configuration (WMS Configuration)
Add a new user
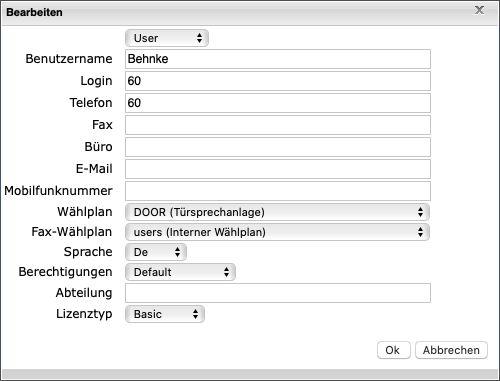
Go to WMS -> Users and click on + to add a new user:
- Fill in the fields:
- Full name: name of the user (e.g. “door intercom system”)
- Extension: extension number used by the intercom
- Dialplan: select the dialplan procedure used by the intercom (if already created)
- License type: select Basic
- Full name: name of the user (e.g. “door intercom system”)
Create SIP password
- Go to WMS → users and select the user “door intercom system”
- Click on “Set password”
- Generate the SIP password
Dialplan
- Go to WMS -> Dialplan -> Dialplan rules and add a new procedure, example:
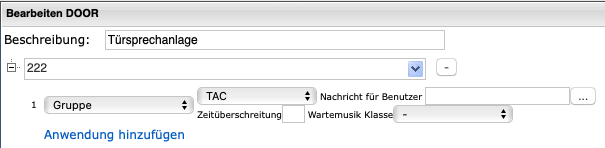
- 222: is the phone number called from the intercom. (see also 2.3)
- Call group (TAC): is the call group that receives calls from the intercom (it can be an extension, several extensions, or several call groups…)
Behnke intercom configuration
Configure door intercom
First-time access at Behnke door intercom (see Behnke Documentation)
Login: admin
Password: admin
All parts that are not described within this documentation can remain “default”!
Login door intercom to PBX via SIP
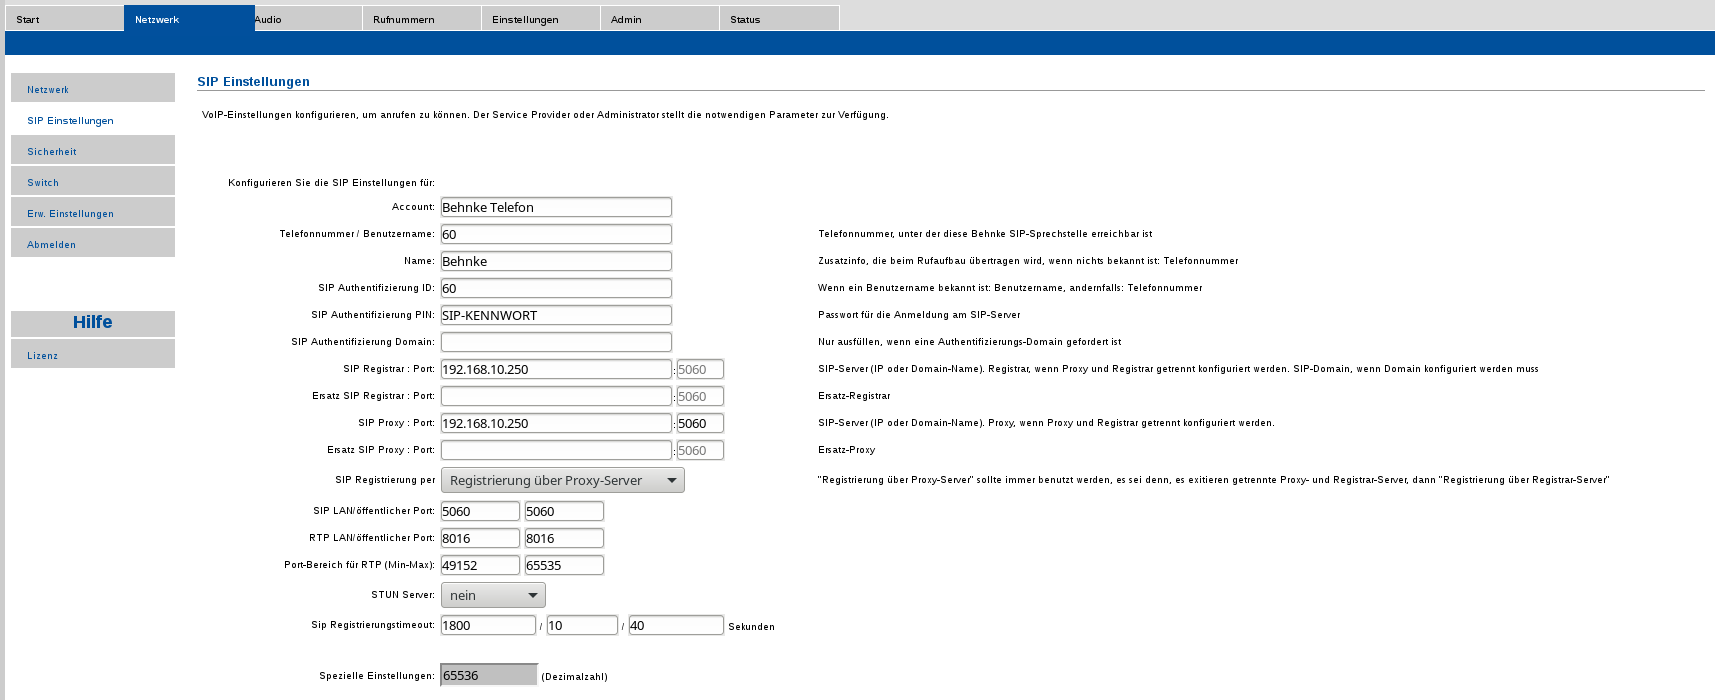
Got to the Behnke Interface → Network → SIP settings
Account: choose any number
Phone number: extension set on Wildix PBX
Name: choose any name
SIP ID: extension set on Wildix PBX
SIP PIN: SIP password generated on Wildix PBX
SIP Registrar: IP address of the PBX
SIP Proxy: IP address of the PBX
Port range for RTP: RTP ports used on the Wildix PBX
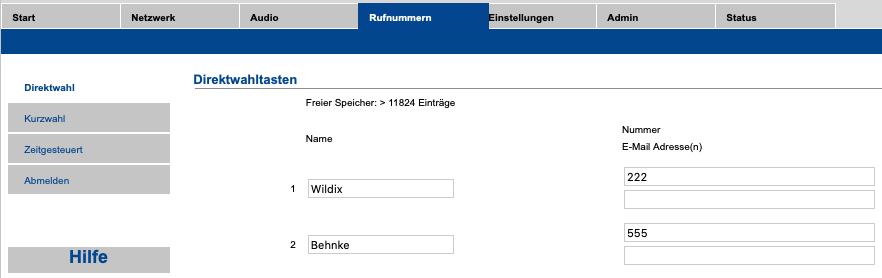
Key Assignment
Select part “direct dial” in phone numbers
Enter the phone number that should be transferred to the Wildix PBX when a key is pressed
Example:
- For key 1 phone number 222 shall be sent
- For key 2 phone number 555 shall be sent
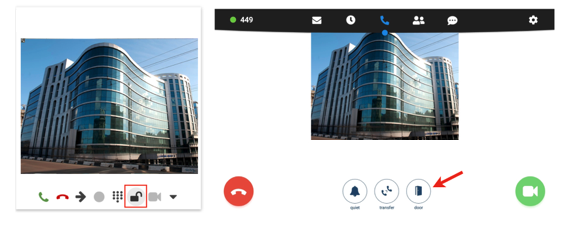
Door open function from Wildix IP phones/ Collaboration
Video preview before answer and an unlock button
Video preview is supported by Collaboration/ Vision/ SuperVision/ WP600AXX/ Android mobile app (iOS app is not supported).
The possibility to add an unlock button can be implemented only for Collaboration/ Vision/ SuperVision. On other devices, you need to manually press the specified DTMF to open the door.
- Go to WMS -> Dialplan -> Dialplan rules and select the Dialplan procedure used for managing intercom calls
Add 2 Custom applications:

- 555 number that is set as direct-dial in the door intercom
that number will be dialed by the door intercom - SIPAddHeader(Camera:http://viewer:viewer@192.168.10.27/bha-api/image.cgi) adds a video preview
- SIPAddHeader(Unlock-Button:0) adds an unlock button
where:
0 - DTMF code to unlock the door - Dial the phone number 10: the call destination for answering calls from the doorphone
you can specify your own destination
Example of video preview with an unlock button:
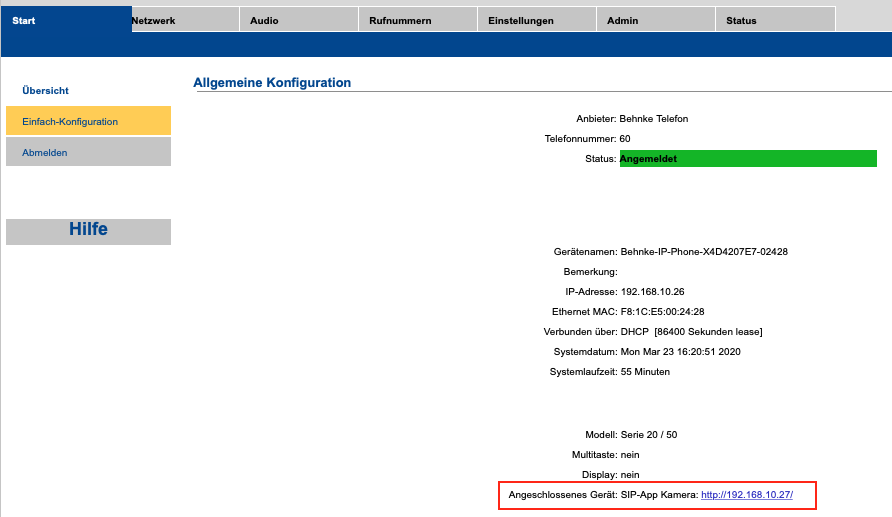
IP address of the Behnke camera
The IP address of the camera is different than the IP address of the door intercom. You can find the IP address of the camera when you log in to the door intercom system as admin.
Go to Start → Basic configuration: